


- Article author: PAMELA MACIAS
Preparation and Laser Cutting Procedure for Textured Chunky Glitter Hybrid Acrylic Sheets Our Textured Glitter Hybrid Acrylic Sheets make any project stand out! It is important to keep in mind that these elegantly beautiful acrylic sheets need to be cut with the utmost care in mind. Here are some very important steps for you to follow to prepare your Textured Glitter Hybrid Acrylic Sheet prior to putting it in your laser cutting machine. These steps are for both CO2 lasers and Diode Laser Machines. Important Reminders Before We Get Started
It is important you fully read this tutorial before cutting your Chunky Glitter Hybrid Acrylic Sheet.
The link for the Hybrid Acrylic Laser Cutting Setting Chart is at the end of the tutorial.
A full video tutorial is offered at the end of the tutorial.
Always do a small test cut to check your settings. Each laser machine is a little different, whether it’s newer, older, clean or needs to be wiped down. Doing a test cut can help prevent mistakes
For Diode Laser Owners: It is also important to note that it may be necessary to increase passes if you are doing large cuts over 4" x 3". In the same respect, it may be necessary to decreases the amount of passes if doing small charms or small earring pieces. Too much heat running on a small cut can result in burn marks along the edges.
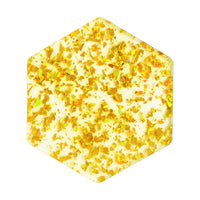
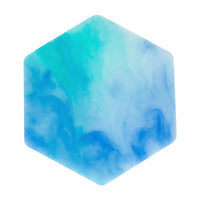
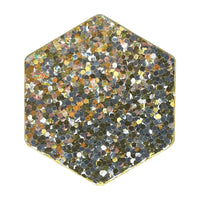
DO NOT ENGRAVE ON CHUNKY GLITTER: Raised chunky glitter doesn’t engrave well, so we don’t recommend it. However, our Smooth Micro Glitter Hybrid Acrylic Sheets are perfect for engraving if you want that extra detail.
Items Needed
Preparation and Post-Cleanup StepsStep 1: Positioning the Hybrid Acrylic
Place your Chunky Glitter Hybrid Acrylic at the farthest left or right of the laser bed, farthest away from the air assist fan at the back of your laser machine. This will reduce the amount of debris blown into your cut design that is generated while cutting.
Step 2: Post-Cut Cleanup
After cutting, you might notice some soot or smoky residue. If this happens, keep the entire acrylic in place on the laser bed to avoid glitter loss while cleaning. Then, grab a few paint brushes. I like to used a larger and a smaller course brush, and a larger and a smaller soft bristle brush. Using the course brush first, brush the edges of your cut design outward, then use the softer brush and do the same. Do this process interchangeably until you are satisfied, then lift your cut design from the laser. If for whatever reason you had your settings configured incorrectly and your final cut came out a little like burnt toast, don’t fret, I have a more extensive tutorial on my blog on how to clean your project up so it is usable again!
Fun Pro Tip! Want to make your project really pop? Add some accent glitter to the cut edges! I like to use UV Light Resin Glue, then sprinkle the glitter over the glue, this is great for a fast, mess-free finish. This extra sparkle can add accents and dimension – perfect for jewelry or layered pieces.Check out our YouTube Channel to follow this tutorial.
Laser Setting and Cutting TipsFor the laser settings, check out the link provided to see the Laser Settings for the various machines we have been able to test on. If you do not see your laser listed, here are some tips to help you narrow in on the best settings for your particular machine.For Diode Laser Owners:
Guidance for Diode Lasers: The best practice when using a diode laser with these fun Hybrid Acrylic Sheets is to slightly increase your power for what you would normally use to cut a 1/8" black acrylic sheet. You then want to significantly increase your speed, and increase the number of your passes.
The goal is to give enough power to break through the additional thickness of the decorative top with a speed that allows enough heat to cut through the sheet without burning the edges of your design. Due to the faster speed, additional passes are necessary to cut all the way through to the back of the acrylic sheet.
Example: For those Diode Laser owners who have wattages not currently listed on our cut/engrave settings chart, here is an example scenarios to assist you with determining the best way to reconfigure your settings to cut your Chunky Glitter Hybrid Acrylic:
The 5 Watt Glowforge Aura/Spark's Diode laser setting for medium thickness black acrylic sheet (general setting used for 1/8" thick black or dark colored acrylic) is 13 speed, 7.5 power, and 3 passes. The settings determined to cut the Chunky Glitter Hybrid Acrylic was reconfigured to 15 speed, 10 power, and 8 passes for smaller cuts and 9 passes for larger cuts. This balance gives you a clean cut without burning the edges.For CO2 Laser Owners:
Guidance for CO2 Lasers: For CO2 lasers, you’ll want to decrease the power, increase the passes, and depending on the wattage of your machine, increase the speed to avoid scorching the decorative top.
The goal is to give enough power to break through the additional thickness of the decorative top with a speed that allows enough heat to cut through the sheet without burning the edges of the decorative top. Due to the faster speed, additional passes are necessary to cut all the way through to the back of the acrylic sheet. Due to the how hot CO2 lasers burn, it is best to reduce the power as to maintain the integrity of the beautiful decorative top layer.
Examples: For those CO2 laser owners who have wattages not currently listed on our cut/engrave settings chart, here are some example scenarios to assist you with determining the best way to reconfigure your settings to cut your Chunky Glitter Hybrid Acrylic:
For the 45 Watt Glowforge Pro CO2 Laser, the general cut setting for medium black acrylic is 165 Speed, Full Power, and 1 Pass. The settings for Chunky Glitter Hybrid Acrylic was tested and reconfigured to maintain the same 165 Speed, but the Power was dropped to 85% for smaller cuts and 95% for larger cut, and the Passes were tripled to 3 Passes.My suggestion for those who have the 40 Watt Glowforge Basic and Plus CO2 Laser would be to run a test cut using your general default cut setting for Medium Black Acrylic, drop your power to 80%, and do 3 passes. If the cut does not go through, either increase your power, or add an additional pass.For the 100 Watt OmTech CO2 Laser, the setting I configure within the LightBurn Software for black or dark colored 1/8" thick acrylic is 635 Speed, 35% Power and 1 Pass. The settings for Chunky Glitter Hybrid Acrylic was tested and reconfigured to almost double the Speed at 1250, the power was reduced to 30%, and the Passes were increased to 3.I hope that this provided information will help you to narrow in on the on the best cut settings for your machine.Currently I have listed the cut settings for laser machines I have access to and I am working on accessing other types of lasers with various wattages so I can add more settings to the cut/engraving chart. If you have a different type of laser wattage for either a CO2 laser or a Diode laser and you have narrowed in on the perfect cut settings for the Chunky Glitter Hybrid Acrylic Sheet, please reach out to us and share so we can add it the the cut settings chart. As a huge THANK YOU, we will send you a general gift card/voucher to use on our site.Please feel free to reach out to us at 619-820-2454 by text or call and we can help guide you through with some tips to get you to your best cut settings.**If you have a laser with a different wattage than the ones listed on our Laser Cutting Settings Chart, and you have narrowed in on the best cut settings for your machine, please let us know so we can add it to the list. As a THANK YOU, we will send you a generous voucher to use on our site! Only Glitter Hybrid Acrylic That Can Be Engraved Is Smooth Micro-Glitter Hybrid AcrylicThere are multiple styles of our Textured Glitter Hybrid Acrylic Sheets. Not all can be laser engraved with nice results. We do not recommend laser engraving on raised texture Chunky Glitter Hybrid Acrylic because it often will result in illegible text or design. However, smooth texture micro glitter decorative toppers do produce nice results with both a light surface engrave as well as a deep engrave to show the acrylic base layer behind.
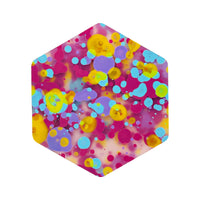
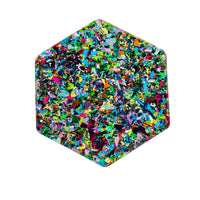
NO for Raised Chunky Glitter
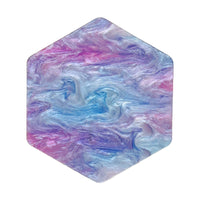
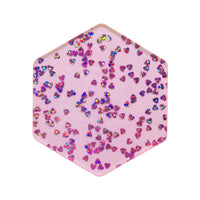
OK for Smooth Micro Glitter
Thank you so much for reading through our tutorial! Now you’re ready to cut the Chunky Glitter Hybrid Acrylic Sheet like a pro! Let me know how your projects turn out, and feel free to share any settings that work well for you. Happy crafting, and don’t forget to like and subscribe to our Youtube Channel so you can receive notification for new tutorials for creative tips and tricks! Helpful Links and VideosHybrid Acrylic Laser Cutting Setting Chart
{"layoutMobile":2,"layoutDesktop":3,"buttonAlign":"Center","buttonText":"Buy now","productTitle":{"hue":213,"brightness":0.83,"saturation":1},"priceColor":{"hue":0,"saturation":1,"brightness":0},"discountPrice":{"hue":356,"saturation":0.74,"brightness":1},"buttonColor":{"hue":213,"brightness":0.83,"saturation":1},"textBottomColor":{"hue":0,"saturation":0,"brightness":1},"activeTitleButton":true,"moreProduct":"View all","moreProductUrl":"acrylicmethat.com","rowNumber":1,"dynamicProductId":[{"id":"gid://shopify/Product/9655368319271","title":"Sparkling Magenta Diamond Glitter Texture Hybrid Acrylic | CO2 and Diode Laser Acrylic Sheets","currencyCode":"USD","amountMax":"19.95","amountMin":"3.95","price":"3.95","compareAtPrice":null,"imagesUrl":"https://cdn.shopify.com/s/files/1/0672/6172/7015/files/pink-textured-glitter-acrylic-plexi-for-laser-cutting-diode-safe-plastic-sheets.jpg?v=1733939498&width=600","urlStore":"/products/magenta-diamond-glitter-texture-hybrid-acrylic-co2-and-diode-laser-acrylic-sheets"},{"id":"gid://shopify/Product/9575650361639","title":"Rainbow Leopard Textured Glitter Hybrid Acrylic Sheet | Diode Laser Acrylic Sheet","currencyCode":"USD","amountMax":"19.95","amountMin":"3.95","price":"3.95","compareAtPrice":null,"imagesUrl":"https://cdn.shopify.com/s/files/1/0672/6172/7015/files/HA0006.jpg?v=1727652812&width=600","urlStore":"/products/rainbow-leopard-textured-glitter-hybrid-acrylic-sheet-diode-laser-acrylic-sheet"},{"id":"gid://shopify/Product/9576233468199","title":"Sparkling Gold Diamond Glitter Texture Hybrid Acrylic | CO2 and Diode Laser Acrylic Sheets","currencyCode":"USD","amountMax":"19.95","amountMin":"3.95","price":"3.95","compareAtPrice":null,"imagesUrl":"https://cdn.shopify.com/s/files/1/0672/6172/7015/files/diode-acrylic-sheet-gold-glitter-plexiglass-for-laser-cutting.jpg?v=1733939728&width=600","urlStore":"/products/gold-diamond-glitter-texture-hybrid-acrylic-co2-and-diode-laser-acrylic-sheets"},{"id":"gid://shopify/Product/9656534401319","title":"Sparkling Blue, Silver and Purple Chunky Glitter Hybrid Acrylic | CO2 and Diode Laser Acrylic Sheets","currencyCode":"USD","amountMax":"19.95","amountMin":"3.95","price":"3.95","compareAtPrice":null,"imagesUrl":"https://cdnapps.avada.io/ag-blog/Elements/productDynamicDemo.jpg","urlStore":"/products/sparkling-blue-silver-and-purple-chunky-glitter-hybrid-acrylic-co2-and-diode-laser-acrylic-sheets"},{"id":"gid://shopify/Product/9656529518887","title":"Red, Green, and Gold Glitter Texture Hybrid Acrylic | CO2 and Diode Laser Acrylic Sheets","currencyCode":"USD","amountMax":"19.95","amountMin":"3.95","price":"3.95","compareAtPrice":null,"imagesUrl":"https://cdnapps.avada.io/ag-blog/Elements/productDynamicDemo.jpg","urlStore":"/products/red-green-and-gold-glitter-texture-hybrid-acrylic-co2-and-diode-laser-acrylic-sheets"},{"id":"gid://shopify/Product/9576220229927","title":"Red, White and Blue Glitter Texture Hybrid Acrylic | CO2 and Diode Laser Acrylic Sheets","currencyCode":"USD","amountMax":"19.95","amountMin":"3.95","price":"3.95","compareAtPrice":null,"imagesUrl":"https://cdn.shopify.com/s/files/1/0672/6172/7015/files/HA0045-2.jpg?v=1727726957&width=600","urlStore":"/products/red-white-and-blue-glitter-texture-hybrid-acrylic-co2-and-diode-laser-acrylic-sheets"},{"id":"gid://shopify/Product/9576186052903","title":"Flower Pattern Iridescent Glitter Texture Hybrid Acrylic | CO2 and Diode Laser Acrylic Sheets","currencyCode":"USD","amountMax":"19.95","amountMin":"3.95","price":"3.95","compareAtPrice":null,"imagesUrl":"https://cdn.shopify.com/s/files/1/0672/6172/7015/files/HA0033-2_2e6eb5c0-7bf2-4989-8d67-6731f8384113.jpg?v=1727722362&width=600","urlStore":"/products/flower-pattern-iridescent-glitter-texture-hybrid-acrylic-co2-and-diode-laser-acrylic-sheets"},{"id":"gid://shopify/Product/9576095154471","title":"Flower Pattern Textured Iridescent Glitter Hybrid Acrylic | CO2 and Diode Laser Acrylic Sheets","currencyCode":"USD","amountMax":"19.95","amountMin":"3.95","price":"3.95","compareAtPrice":null,"imagesUrl":"https://cdn.shopify.com/s/files/1/0672/6172/7015/files/HA0012-2.jpg?v=1727710525&width=600","urlStore":"/products/flower-pattern-textured-iridescent-glitter-hybrid-acrylic-co2-and-diode-laser-acrylic-sheets"}],"typeSearch":"collection","device":"desktop","decimalsPrice":2,"aspectRatio":"3 / 4","isAutoPlay":false,"isNavigation":false,"isPriceDisplay":false,"rowDynamic":"mot","activeDecimals":false,"hidden":false,"locked":false,"positionPrice":false,"currencyCodeCustom":"$","isRemoveBranding":true,"activeDynamicProd":true,"blockName":"Product"}
Sparkling Magenta Diamond Glitter Texture Hybrid Acrylic | CO2 and Diode Laser Acrylic Sheets
USD 3.95
Buy now
Rainbow Leopard Textured Glitter Hybrid Acrylic Sheet | Diode Laser Acrylic Sheet
USD 3.95
Buy now
Sparkling Gold Diamond Glitter Texture Hybrid Acrylic | CO2 and Diode Laser Acrylic Sheets
USD 3.95
Buy now
Sparkling Blue, Silver and Purple Chunky Glitter Hybrid Acrylic | CO2 and Diode Laser Acrylic Sheets
USD 3.95
Buy now
Red, Green, and Gold Glitter Texture Hybrid Acrylic | CO2 and Diode Laser Acrylic Sheets
USD 3.95
Buy now
Red, White and Blue Glitter Texture Hybrid Acrylic | CO2 and Diode Laser Acrylic Sheets
USD 3.95
Buy now
Flower Pattern Iridescent Glitter Texture Hybrid Acrylic | CO2 and Diode Laser Acrylic Sheets
USD 3.95
Buy now
Flower Pattern Textured Iridescent Glitter Hybrid Acrylic | CO2 and Diode Laser Acrylic Sheets
USD 3.95
Buy now
View all
Learn More