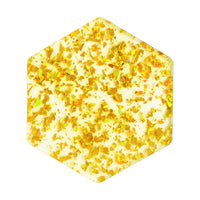
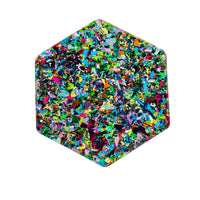
Shimmer and Shine: Prepping for Laser Cutting Chunky Glitter Hybrid Acrylic
If you've ever dreamed of adding a dazzle factor to your laser crafts, chunky glitter hybrid acrylic sheets are your new best friend. Their stunning textures and sparkle bring a unique pop to jewelry, signs, and décor. But, prepping and slicing through this specialty material needs a bit of finesse. Whether you have a diode laser acrylic setup or a powerhouse CO2 machine, learning the right techniques is the secret to flawless, sparkling results.
Essential Tools for Chunky Glitter Hybrid Acrylic Success
Before you dive into laser cutting, make sure your workspace is prepped. Here’s a quick checklist to set yourself up for sparkling success:
A sheet of chunky glitter hybrid acrylic (of course!)
Two types of brushes: one with a coarse bristle, and another that's soft (think: leftover painter or makeup brushes)
Your trusty diode or CO2 laser cutter
Pro tip: Raid your makeup or art supply stash! There’s no need to buy fancy brushes for post-cut cleanup.
Laser Cutting Basics: Prep, Test, and Go!
Every laser cutter behaves differently—yes, even if they’re the same model. Factors like machine age, cleanliness, and wattage affect your final result. For any laser crafts project, always run a small test cut first on your hybrid acrylic. It helps you nail the right settings without wasting materials or making costly errors.
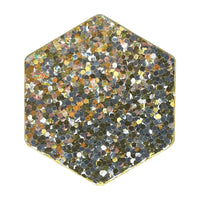
Know Your Acrylic: Raised vs. Smooth Glitter Hybrids
Chunky glitter hybrid acrylic sheets look magical but don’t engrave well because of their raised, chunky texture. If you’re after engraved details, try smooth micro glitter hybrid acrylic—those engrave beautifully on both diode and CO2 laser acrylic machines.
Laser Settings for Diode Laser Acrylic Cutting
Tuning your diode laser for thicker, textured materials takes some experimentation. Follow these guidelines as a starting point:
Use higher power than you would on standard 1/8 inch black acrylic
Increase your speed and the number of passes (layers cut)
This combo ensures you slice through the thick top layer without burning edges
For example, if you use a 5W diode laser like Glow Forge Aura or Spark:
Typical Medium Black Acrylic Settings: Speed 13, Power 7, 3 Passes
Chunky Glitter Hybrid Acrylic: Speed 15, Power 10, 8-9 Passes
Experiment with similar increases for your own laser system. Always put safety first and watch your results closely!
CO2 Laser Users: Achieving Perfect Cuts on Hybrid Acrylic
CO2 lasers are powerful and run hot—great for speed, but you need to adjust settings to avoid scorching the gorgeous glittery surface. Here’s what to try:
Reduce power from standard acrylic settings
Keep speed steady or even slightly increased
Triple your number of passes to ensure clean cuts
Sample Settings from the Pros:
45 Watt Glow Forge Pro: Speed 165, Power 85% (smaller cuts) or 95% (larger cuts), 3 Passes
40 Watt Glow Forge Basic/Plus: Use default medium black acrylic settings, drop power to 80%, and use 3 or more passes
100 Watt OM Tech CO2: Speed 1250, Power 30%, 3 Passes (Black 1/8 in acrylic is normally 635 speed, 35% power, 1 Pass)
Not listed? Start with a similar approach: lower power, more passes, and a quick test cut!
Placement Matters: Where to Set Your Acrylic Sheet
Prevent debris from blowing onto your masterpiece by positioning your chunky glitter hybrid acrylic as far left or right as possible on your laser bed—away from the air assist fan. This simple trick keeps your laser crafts looking sharp and clean.
Post-Cut Cleanup: Keep that Sparkle!
Laser cutting often leaves behind some sooty residue or smoky smudges. To maintain the glitter:
Keep the acrylic sheet on the laser bed—don’t pick it up yet!
Take your coarse brush and gently brush outward along the cut edges
Follow up with a soft brush for delicate removal of remaining dust and soot
Repeat brushing as needed until your project sparkles
Accidentally torched the edges? Don’t worry! With the right cleaning technique, you can save your beautiful project. Check out my more detailed cleanup tutorials if you hit a snag.
Pro Tip: Amp Up the Glam with Edge Glitter
Want to really wow your friends or customers? Try this easy technique:
Brush UV resin glue onto the cut edges
Sprinkle extra glitter over the glue
Cure under a UV light for a lasting, mess-free shine
This works wonders on jewelry, statement pieces, or layered crafts and keeps your projects as unique as you are!
Conclusion: Ready, Set, Sparkle! Share Your Laser Crafts with the World
Cutting chunky glitter hybrid acrylic with your diode laser acrylic or CO2 cutter is truly rewarding once you follow the steps for prepping, testing, and cleaning. With the right laser settings and a touch of post-cut TLC, your laser crafts will sparkle and shine like never before.
We love seeing what you create! Share your results on social media and tag us, or drop your favourite settings in the comments to help fellow makers. For more tips, tricks, and glittery project ideas, don’t forget to like and subscribe to my channel—and happy crafting!
{"layoutMobile":2,"layoutDesktop":3,"buttonAlign":"Center","buttonText":"Buy now","productTitle":{"hue":213,"brightness":0.83,"saturation":1},"priceColor":{"hue":0,"saturation":1,"brightness":0},"discountPrice":{"hue":356,"saturation":0.74,"brightness":1},"buttonColor":{"hue":213,"brightness":0.83,"saturation":1},"textBottomColor":{"hue":0,"saturation":0,"brightness":1},"activeTitleButton":true,"moreProduct":"View all","moreProductUrl":"acrylicmethat.com","rowNumber":1,"dynamicProductId":[{"id":"gid://shopify/Product/9576209088807","title":"Cherry Pattern Hybrid Acrylic | CO2 and Diode Laser Acrylic Sheets","currencyCode":"USD","amountMax":"19.95","amountMin":"3.95","price":"3.95","compareAtPrice":null,"imagesUrl":"https://cdn.shopify.com/s/files/1/0672/6172/7015/files/HA0042-2.jpg?v=1727725726&width=600","urlStore":"/products/cherry-pattern-hybrid-acrylic-co2-and-diode-laser-acrylic-sheets","altImage":""},{"id":"gid://shopify/Product/9576233468199","title":"Sparkling Gold Diamond Glitter Texture Hybrid Acrylic | CO2 and Diode Laser Acrylic Sheets","currencyCode":"USD","amountMax":"19.95","amountMin":"3.95","price":"3.95","compareAtPrice":null,"imagesUrl":"https://cdn.shopify.com/s/files/1/0672/6172/7015/files/diode-acrylic-sheet-gold-glitter-plexiglass-for-laser-cutting.jpg?v=1733939728&width=600","urlStore":"/products/gold-diamond-glitter-texture-hybrid-acrylic-co2-and-diode-laser-acrylic-sheets","altImage":""},{"id":"gid://shopify/Product/9576220229927","title":"Red, White and Blue Glitter Texture Hybrid Acrylic | CO2 and Diode Laser Acrylic Sheets","currencyCode":"USD","amountMax":"19.95","amountMin":"3.95","price":"3.95","compareAtPrice":null,"imagesUrl":"https://cdn.shopify.com/s/files/1/0672/6172/7015/files/HA0045-2.jpg?v=1727726957&width=600","urlStore":"/products/red-white-and-blue-glitter-texture-hybrid-acrylic-co2-and-diode-laser-acrylic-sheets","altImage":""}],"typeSearch":"product","device":"desktop","decimalsPrice":2,"aspectRatio":"3 / 4","isAutoPlay":false,"isNavigation":false,"isPriceDisplay":false,"rowDynamic":"mot","activeDecimals":false,"hidden":false,"locked":false,"positionPrice":false,"currencyCodeCustom":"$","isRemoveBranding":true,"activeDynamicProd":true,"blockName":"Product"}
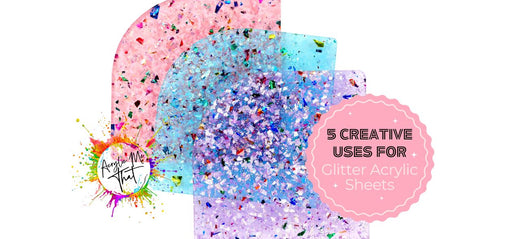
Looking to add a touch of sparkle to your DIY projects? Glitter acrylic sheets might be your answer.
These shimmering sheets are not just pretty to look at, they're also versatile and easy to work with. Whether you're crafting jewelry, signage, or cake toppers, glitter acrylic can elevate your creations to a whole new level of glamour.
In this article, we'll explore five creative ways to use glitter acrylic sheets in your craft projects. Let's dive in and let your creativity shine!
Tips for Cutting Acrylic with Precision
Acrylic sheets are a versatile material, perfect for a range of creative projects. From patterned designs to coloured plexiglass, the possibilities are endless.
But, to unlock the full potential of these materials, precision is key. This is especially true when using laser cutting techniques.
In this article, we'll share tips on how to cut acrylic with precision. Whether you're a DIY enthusiast or a small business owner, you'll find these insights valuable. Let's dive in.
Understanding Acrylic Sheets for Laser Cutting
Acrylic sheets are a popular choice for laser cutting. They're durable, easy to work with, and come in a variety of styles.
You can choose from clear, coloured, patterned, or even glitter acrylic sheets. Each type offers unique aesthetic effects for your projects.
Understanding the properties of your chosen acrylic material is the first step towards achieving precision cuts. It's all about knowing your medium.
Choosing the Right Acrylic Sheet
When it comes to laser cutting, not all acrylic sheets are created equal. The thickness and type of acrylic can greatly impact the final result.
For instance, cast acrylic sheets are generally better for laser cutting than extruded ones. They offer cleaner cuts and less risk of melting or warping.
Here are a few things to consider when choosing your acrylic sheet:
Thickness: Thicker sheets may require slower cutting speeds or multiple passes.
Type: Cast acrylic sheets usually provide better results than extruded ones.
Colour and pattern: These can affect the visibility of your cuts and the overall look of your project.
Preparing Your Design for Precision Cutting
Before you start cutting, it's crucial to prepare your design properly. This means using a vector-based design software that can output to your laser cutter's format.
Remember to account for the kerf, or the width of the cut. This can affect the fit of interlocking pieces.
Lastly, always test your settings on a scrap piece of acrylic first. This can save you from costly mistakes on your actual project.
Laser Cutting Settings for Acrylic
The settings on your laser cutter play a big role in the quality of your cuts. Power and speed settings need to be balanced to achieve clean, precise cuts.
Heat is a major factor when cutting acrylic. Techniques like multiple passes at lower power can help reduce heat impact and prevent warping.
Remember to focus your laser correctly. This can greatly affect the quality of your cuts and the lifespan of your laser cutter.
Achieving Smooth Edges and Reducing Chipping
Smooth edges are a sign of a well-executed laser cut. To achieve this, you need to consider the kerf, or the cut width. This can affect the fit and finish of your final product.
Chipping can be a problem when cutting acrylic. To reduce this, ensure your material is properly secured and your laser is correctly focused.
Remember, practice makes perfect. Don't be afraid to test different settings on scrap material before making the final cut.
The Benefits of Wholesale Acrylic Sheets
Buying wholesale acrylic sheets for laser cutting can be a smart move. It's not just about cost savings, though that's a big plus.
Having a good stock of materials on hand means you can take on larger projects. It also allows for more flexibility in your designs.
From pattern acrylic sheets to coloured plexiglass and glitter acrylic sheets, wholesale pricing opens up a world of creative possibilities.
Post-Processing and Cleaning Cut Acrylic
After laser cutting, your acrylic pieces may need a bit of cleaning. This is especially true if you've used protective film during the cutting process.
A gentle wash with mild soap and water usually does the trick. Just remember to dry the pieces thoroughly to avoid water spots.
Safety and Environmental Considerations
When working with acrylic, safety should always be a priority. Always wear protective gear, including safety glasses and gloves.
Ensure your workspace is well-ventilated. Acrylic can produce fumes when cut, which can be harmful if inhaled.
Lastly, remember to recycle your acrylic scraps. Acrylic is a plastic, and we all need to do our part to reduce plastic waste.
Conclusion: Why Precision Matters
Precision in cutting acrylic sheets is not just about aesthetics. It's about efficiency, cost-effectiveness, and safety.
So, whether you're a hobbyist or a professional, always aim for precision. It will make your work stand out and keep your costs down.
Laser cutting is a popular method for shaping acrylic sheets, especially cast acrylic ones. It's precise, efficient, and can create intricate designs. However, to get the best results, you need to know a few tricks. In this guide, we'll share some top tips for laser cutting extruded acrylic sheets and hand cast acrylic sheets.